Oil Sampling Best Practices: Accurate Techniques for Reliable Analysis

Team Minimac
Dec 09, 2024 · 2 min read


Introduction
One of the most important and least understood parts of
maintaining and optimizing machinery performance is oil sampling.
By sampling oil accurately and in a representative way, firms can
track wear trends, find potential failures in machinery, and
prolong the useful life of both expensive assets and operational
expenditure. Whether conducting oil sampling on a single piece of
equipment or in a machine shop with little individual equipment,
oil sampling will offer information on the health of your
lubricant, saving you from downtime that costs dollars.
This article will discuss the best practices for oil sampling: the
procedures, sampling positions, and hardware to capture the most
accurate and dependable results. In addition, we will offer advice
on how to prevent common sampling errors and explain why
consistency is key to success in your oil analysis program.
With these rules, you can greatly enhance your oil analysis and
protect your machinery investments even better.

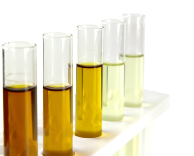
Used Oil Sampling: The Basics
Analysing oil accurately is dependent upon oil sampling. Oil analysis can only monitor oil condition, predict machine failures, or extend asset life when it relies on a representative sample. Whether utilising a test kit from a service provider or your own equipment, sampling requires careful attention to detail otherwise our results will be consistent they will be consistently inaccurate and of little use.
Maximizing Data Density & Minimizing Disturbance
The two objectives in getting representative sampling are to retrieve the maximum density and the least disturbance of the data.
- Data Density: The oil sample must be collected with a view to obtaining maximum useful information per millilitre of oil. These involve important elements like cleanliness, dryness, depletion of additives and concentration of wear particles.
- Data Density: Data Disturbance: It is important that the sample be free from disturbance with respect to extraction. Contaminants from around the sampling system can contaminate the data and obscure the differences between real oil states and sampling system contaminants.
The site, procedure, and the sampling device can help you make your sample, accurate, valid, and reliable. Consistency matters — Uniform sampling procedures across the team help to institutionalize oil analysis, ensuring the consistency and reliability of the data.
Selecting Sampling Place
All parts of a machine do not produce the same quality of data. Some places provide much more useful intelligence than others. Thus, for some machines, several sampling points are necessary to have a full picture of their condition.
- Turbulence Regions: To sample from regions where a fluid is well mixed, the oil flow is turbulent, which can provide more reliable information for wear debris and contaminants.
- Before Filters: Any sample of an area before a filter, screen, or separator, which will remove impurities that can affect the sample integrity.
- Return Lines and Drain Lines: At times, these two sampling points can be the ideal location because, before the fluid returns to the tank, where it will dilute any sample, there will be a high concentration of wear debris and contaminants.
Live Zone Oil Sampling
It means sampling the oil drained from systems that are still
in operation. The samples should be taken from the turbulent
zones, after important components of the machine and under normal
operation conditions for best quality. Stay clear of sampling from
areas of stagnant water or just after filter changes and anytime
some maintenance has just taken place, as this can result in false
results.
Follow for more information about Minimac Systems -
Click Here.
How to Take Samples From Pressurised Lines
There are different types of sampling methods that can be employed for pressurized systems, such as:
- Portable high-pressure tap sampling: employ a ball valve or needle valve with stainless steel tubing to reduce pressure before the sample goes into the bottle.
- Minimess Tap Sampling: Installed on an elbow, it is a simple method of sampling, effective only for low-pressure systems (less than 500 psi).
- Tap Sampling: Take a sample from an open or closed valve after sufficient flushing
- Minimess Tap Sampling Portable: Incorporates a quick-connect coupling that allows portable on-site sampling and at high-pressure lines.
Sampling through Non-Circulating Systems
In the case of systems with no forced circulation, e.g., for splash-lubricated or ring bath-lubricated bearings, sampling may be more difficult. Techniques include:
- Drain port sampling: This is done by sampling from the sump or casing directly, but the sample needs to be free of any sediment.
- Vacuum Sampling: A vacuum is created with the assistance of a vacuum pump to pull fluid into the sample bottle, ideal especially for viscous oils.
Oil Sampling Bottles & Hardware: What to know to get an accurate sample
Accurate oil analysis starts with a proper method of sampling oil and the appropriate tools. An important step to ensure the accuracy of a sample is flushing all sampling hardware before taking a sample. In that way, contamination is avoided and a representative sample is guaranteed.
Key Steps for Effective Sampling:
-
Flush the Hardware:
- Keep a spare bottle to collect any purged fluid when flushing
- Impinge 5–10X dead space volume of the same system on the pre-collected sample.
2. Dead space includes:
- System dead-legs
- Ports, Valves, and Adapters for Sampling
- Probes on sampling devices
- Adapters for vacuum pumps
- Plastic tubing (only used once to avoid contamination)
Select the Sampling Bottle
- Size: Choose according to the planned tests and laboratory specifications. Typical sizes are between 50 mL to 200 mL. Tests like particle counts and viscosity analysis are done in larger bottles.
-
Material:
- Plastic polyethylene: Opaque—prevent visual inspection, but it has a low weight and is inexpensive.
- PET Plastic: Transparent, glass-like material suitable for most oils, allowing for immediate visual observation.
- Glass: long-lasting and reusable, but available in heavier, more expensive, and breakable versions. Offers superior cleanliness.
Fill Bottles Appropriately:
- Leave a small ullage to allow mixing up of fluids; only then realize even distribution of suspended solids & water
- Very Low Viscosity: (ISO VG 32 or less) fill 3/4 full.
- Medium Viscosity (ISO VG 32 to ISO VG 100): Fill to 2/3 capacity
- High Viscosity (over ISO VG 100): Use 50% of the total volume
Ensure Bottle Cleanliness: Choose bottles according to cleanliness standards for your application. The need for cleanliness may be vital to accurate analysis, and should be arranged with the laboratory in advance.
Key Tips for Effective Oil Sampling
- 1. Sampling when the equipment is performing under nominal conditions: Ensure enough sampling is performed when the equipment is functioning within its nominal operating parameters (i.e., temperature, speed, pressure, etc.) to create the most representative data sets.
- 2. Before Filters: Sample upstream of any filters and separators so that the sample represents the total state of the oil.
- 3. Use Written Procedures: Ensure all team members are sampling in the same manner for reliability and consistency.
- 4. Flush All Your Equipment: You must flush your sampling devices in order to remove contaminants before collecting the sample.
- 5. Regular Sampling: The oil should be sampled regularly for early detection of problems.
- 6. Avoid Submitting Samples to a Lab that Makes Changes in the Properties of the Class of Oil: The properties of the oil may change after submission of samples to the lab, which may adversely affect the results of the analysis.
These tips will help you with accurate and reliable samples that will provide valuable information about the health of your machinery and the crucial element of increasing the asset life.
Conclusion
All in all, there is a need for sampling oil so that there is no
danger to the flawless working of the machine and this in turn
would avoid any costly shutdowns. Make Sure Your Oil Analysis
Results Are as Accurate and Reliable as Possible by Following Best
Practices for Sample Collection, Location Selection, and the Right
Equipment. While consistency and attention to detail are central,
you get your sample from circulating systems or wet sumps or
non-circulating systems—the quality of your sample is directly
proportional to the quality of the insights you obtain.
Not neglecting the oil sampling approach pays its dividends as you
proactively detect problems and elongate equipment lifespan, and
minimizing downtimes ensures overall operational efficiency. A
sound sampling procedure coupled with a continuous oil analysis
program will protect your equipment and keep it performing at its
best for years to come.
Learn more about our services and industry insights by visiting
our official LinkedIn page:
Minimac Systems
FAQs:
- Use a designated sampling port or in some cases, a drain valve.
- Ensure tools and containers are clean and ISO-compliant.
- Flush the sampling line to avoid any residual oil or contamination.
- Collect the sample with the machinery running at normal temperature.
- Seal the sample container and label it for the analysis as well as the machine details, date and time of operation.
- Send the sample to the specialized lab for analysis. It is recommended to do so as fast as possible, but not later than 24 hours.
- Detect contaminants such as dirt, water, and fuel.
- Understand the lubricant’s condition to anticipate whether it should be replaced.
- Identify wear particles for predicting the potential mechanical issue.
- Avoid equipment failure by timely detecting the issues.
- Enhance the machinery’s lifespan by providing optimal conditions for operation.
- First of all, one must find an appropriate point to take a sample where the oil’s flow is constant.
- Second, depending on the method and procedure used, either the pump or another specialized sampling tool should be used.
- Third, the old, dirty, or residual oil from the lubricant or hydraulic fluid should be flushed out of the sampling line.
- Fourth, use a sterile, sealed container, in which the oil should be dripped if it is in small quantities and poured if it flows. On the other hand, the bottle should not be overfilled. Lastly, the sample should be labeled correctly and sent to the specialized lab for analysis as soon as possible.
Share this on